Cracking the Code on Pie Crust: Fat, Water, and the Art of the Perfect Flake
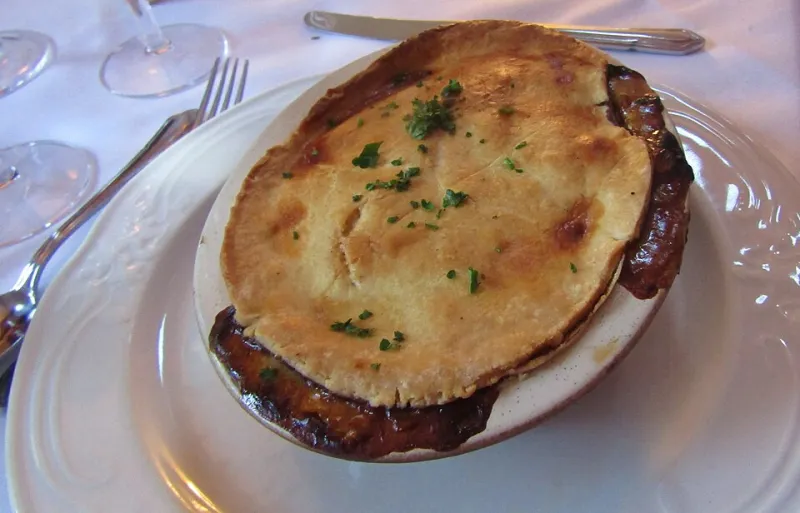
Photo: Kolforn (Kolforn) I'd appreciate if you could mail me ([email protected]) if you want to use this picture out of the Wikimedia project scope. This file is licensed under the Creative Commons Attribution-Share Alike 4.0 International license. Yo
There's something quietly magical about a great pie crust. You press a fork through it and it shatters just so — layers peeling apart, buttery and golden, with that satisfying crunch that tells you everything went right. But there's also something deeply humbling about a bad one. Tough, dense, greasy, or pale — pie crust failures are some of the most discouraging moments a home baker can face.
Here at Sweet Pea Bakery, we believe every baker deserves to feel confident rolling out that dough. So let's pull back the curtain on what's really going on inside your pie crust, and talk through exactly how to fix it when things go sideways.
It All Starts with Fat — and How You Handle It
Fat is the heart of pie crust. It's what creates those gorgeous, shatteringly flaky layers, and it's also the first place most bakers go wrong.
When fat is incorporated into flour, it coats the gluten-forming proteins and physically interrupts their ability to link up into long, chewy strands. Smaller, fully blended fat pieces produce a more tender, crumbly crust — think shortbread. Larger, flatter fat pieces create steam pockets during baking, which puff apart into distinct, papery layers. That's your flake.
The key is keeping your fat cold. Cold butter (or lard, or shortening — we'll get to that) stays in solid chunks as you work it into the flour. The moment fat warms up and starts to melt, it blends too thoroughly into the dough, and those precious flake-creating pockets disappear. Some bakers even stick their mixing bowl in the freezer for ten minutes before they start. That's not overkill — that's smart.
Which fat should you use?
- Butter delivers the best flavor and a beautiful golden color. Use European-style butter if you want an extra-rich result.
- Lard produces the flakiest texture of all, thanks to its unique fat crystal structure. It's making a comeback in old-school pie recipes for good reason.
- Vegetable shortening is very forgiving and easy to work with, though it lacks the flavor punch of butter.
- A blend of butter and shortening is the sweet spot many bakers land on — you get flavor from the butter and workability from the shortening.
Water Is the Wild Card
If fat is the heart of pie crust, water is the thing that can break it. Too little, and the dough crumbles and cracks when you roll it. Too much, and you've activated too much gluten, turning your crust chewy and tough.
The goal is to add just enough water to bring the dough together — no more. Ice water is non-negotiable here. Warm water softens the fat and jumpstarts gluten development in all the wrong ways.
Add your water one tablespoon at a time, tossing the dough with a fork between additions rather than kneading it. You're looking for dough that holds together when you squeeze a handful, but still looks a little shaggy and rough. If it looks smooth and polished at this stage, you've gone too far.
Humidity matters too. On a dry winter day in the Midwest, you might need an extra tablespoon of water. On a muggy August afternoon in the South, you may need less. This is one of those places where baking is as much intuition as it is instruction.
The Resting Period: Non-Negotiable
Once your dough comes together, wrap it tightly in plastic wrap and let it rest in the refrigerator for at least one hour — two is better, and overnight is best of all.
This rest period does two important things. First, it allows the water to distribute evenly throughout the dough, which makes rolling much easier and more consistent. Second, it relaxes the gluten. Freshly worked dough is tight and elastic; it'll spring back when you try to roll it and shrink dramatically in the oven. Rested dough is cooperative, pliable, and stable.
Skipping this step is one of the most common reasons home bakers end up with a crust that climbs up the sides of the pan and slides down during baking. Give the dough its rest. It's worth every minute.
Rolling It Out Without Wrecking It
Flour your surface lightly — and we mean lightly. Too much flour worked into the dough during rolling throws off your fat-to-flour ratio and toughens the crust. A silicone rolling mat or a piece of parchment paper can be a real lifesaver here.
Roll from the center outward, rotating the dough a quarter turn every few rolls to keep it even and prevent sticking. If it cracks at the edges, let it sit for five minutes — it may just need to warm up slightly. If it tears, patch it with a scrap piece of dough and press gently to seal.
Transfer the dough to your pie dish by rolling it loosely around your rolling pin and unrolling it over the pan. Never stretch the dough to fit — stretching causes shrinkage in the oven. Instead, lift and gently ease it into the corners.
Troubleshooting the Most Common Pie Crust Problems
Tough crust: You overworked the dough or added too much water. Next time, use a lighter hand and stop mixing the moment the dough just comes together.
Greasy crust: Your fat got too warm during mixing. Chill everything — your bowl, your tools, your hands under cold water — before you start.
Soggy bottom: The filling released too much liquid, or the crust wasn't pre-baked (blind baked) when needed. For wet fillings like custard or fresh fruit, always blind bake your crust first. Brushing the bottom with a thin layer of egg white before adding filling also helps create a moisture barrier.
Shrinking crust: The dough wasn't rested long enough, or it was stretched to fit the pan. Rest longer and ease — don't pull — the dough into place.
Cracking when rolled: The dough is too cold or too dry. Let it sit at room temperature for five to ten minutes before rolling, or add a tiny bit more water next time.
Pale, undercooked crust: Your oven may be running cool, or the pie was placed too high in the oven. For a deeply golden bottom crust, bake on the lowest rack and consider using a dark metal pie pan, which conducts heat more efficiently than glass.
A Little Patience Goes a Long Way
Pie crust rewards the baker who slows down. It asks you to keep things cold, add water carefully, rest the dough generously, and roll with confidence rather than force. None of these steps are complicated once you understand why they matter.
At Sweet Pea Bakery, we always say that baking is a conversation between the baker and the ingredients. Pie crust is one of those conversations that teaches you something new every time — about your kitchen, your climate, your hands, and your touch. And the moment you pull a perfectly flaky, golden crust from the oven? That's the kind of joy that makes every cracked, shrunk, or soggy experiment completely worth it.
Keep baking, keep learning, and trust the process. Your perfect pie crust is closer than you think.